How to see WiFi Password in Windows 10
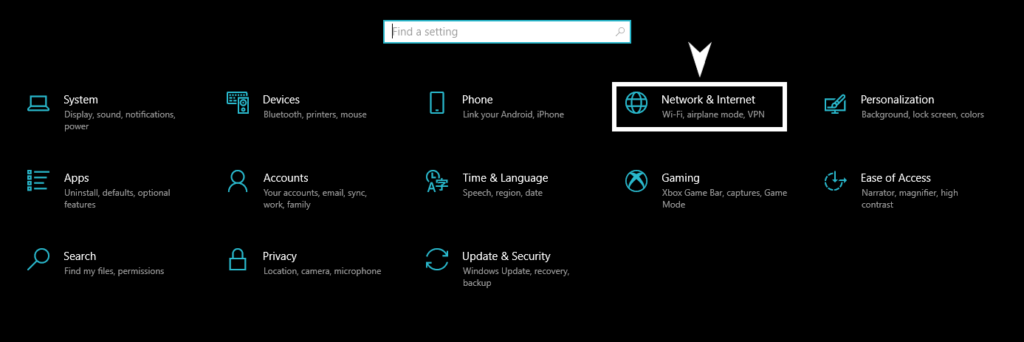
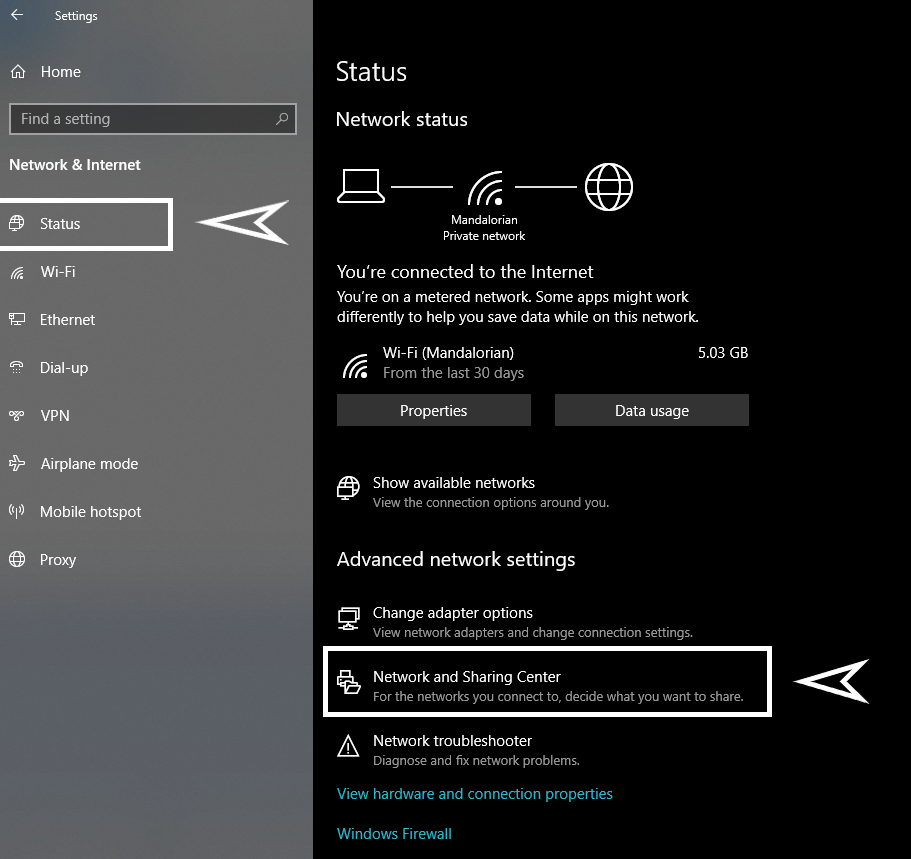
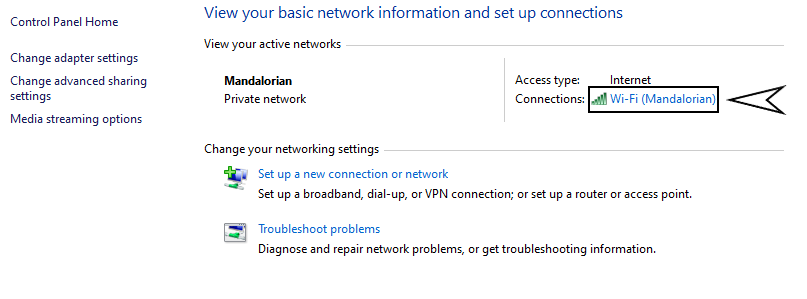
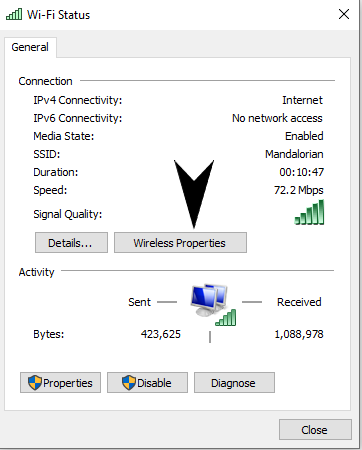
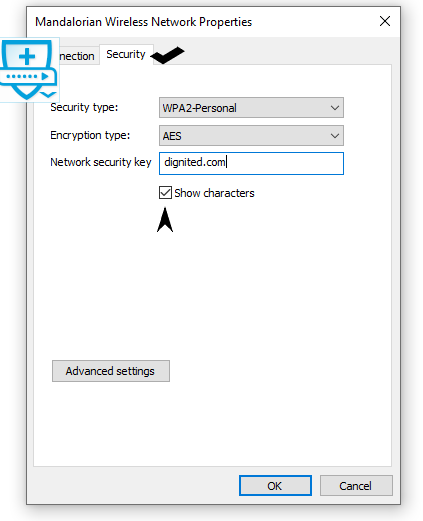
The first step is to get to Network and Internet settings and you can either do this by either right-clicking on the WiFi icon and clicking on ‘Open Network and Internet settings’ or click on the windows icon and then settings before clicking Network and Internet. This takes you to Status menu but if it doesn’t you can click on it. Here you would see Network and Sharing Center, click on it and another window will open. In the new window, under ‘view your active networks’, click on your WiFi name which is like this ‘Wi-Fi (WiFi name)’. Read More: The updated guide to WiFi wireless network connectivity Furthermore, a small tab opens up, and then you click on Wireless Properties as shown below. Another tab opens up and you navigate to the security section where you will see the show password checkbox below the network security key.. Just click on the checkbox and your password will appear. Once you’ve seen your password as shown, you can go ahead and close the tabs and that is it. You have successfully checked your WiFi password in just a few steps.
Conclusion
You would have to be connected to the WiFi network before you can check for the password. In other words, the WiFi must have been saved on the Windows 10 PC.


